What Is ETL Process?
ETL stands for Extract, Transform and Load. It refers to a trio of processes which are required to move the raw data from its source to a data warehouse or a database. Extract: Extraction of data is the most important step of ETL which involves accessing the data from all the Storage Systems. The storage systems can be the RDBMS, Excel files, XML files, flat files, ISAM (Indexed Sequential Access Method), hierarchical databases (IMS), visual information etc. Extraction process also makes sure that every item’s parameters are distinctively identified irrespective of its source system. Transform: Transformation is the next process in the pipeline. In this step, entire data is analyzed and various functions are applied on it to transform that into the required format. Generally, processes used for the transformation of the data are conversion, filtering, sorting, standardizing, clearing the duplicates, translating and verifying the consistency of various data sources. Load: Loading is the final stage of the ETL process. In this step, the processed data, i.e. the extracted and transformed data, is then loaded to a target data repository which is usually the databases. While performing this step, it should be ensured that the load function is performed accurately, but by utilizing minimal resources.

Talend as ETL Tool:
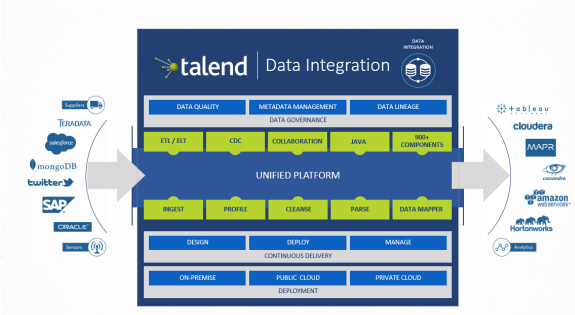
Talend open studio (TOS) for data integration is one of the most powerful data integration ETL tool available in the market. TOS lets you to easily manage all the steps involved in the ETL process, beginning from the initial ETL design till the execution of ETL data load. This tool is developed on the Eclipse graphical development environment. Talend open studio provides you the graphical environment using which you can easily map the data between the sources to the destination system. All you need to do is drag and drop the required components from the palette into the workspace, configure them and finally connect them together. It even provides you a metadata repository from where you can easily reuse and re-purpose your work.
What does Talend TDI offer?
Agile Integration: Respond faster to business requests without writing code using over 900 out-of-the-box connectors, rich Eclipse-based graphical tools, and an optimized-for-performance code generator. Team Productivity: Collaborate like never before using powerful versioning, impact analysis, testing and debugging, metadata management and shared repository tools. Manage with Ease: Be in the management cockpit using advanced monitoring and scheduling features with real-time data integration dashboards and centralized control for instant deployment across thousands of nodes. Stay on the Cutting Edge: Built on standards by the largest open source data integration developer community, you will not have to wait to be using the latest and coolest data integration features. Develop and deploy 10 times faster: The Eclipse-based Studio provides easy drag-and-drop, point-and-click job design with no need for hand-coding.
Creating New Project/Connection to connect EBS DB from Talend:
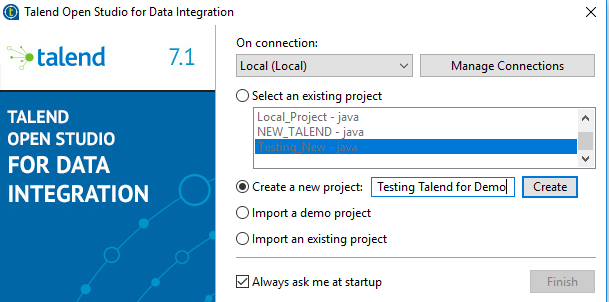
Start the Talend Studio (TOS) and wait for the log on screen to appear. Click on the Create new project button and give the valid name then click on create and Finish.
After open the TOS Repository, create a job under Job Designs and give the valid details.
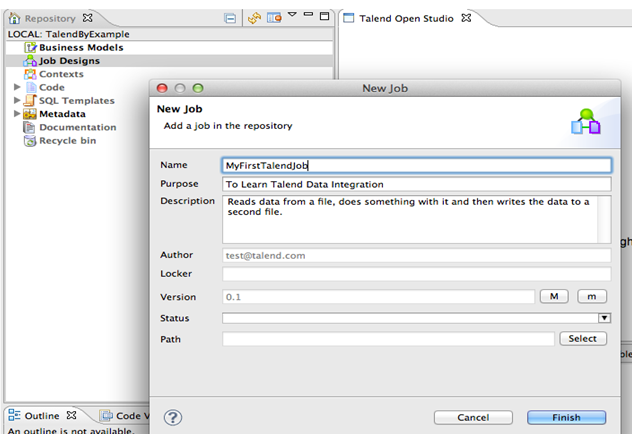
Go to Db Connection under Metadata from Repository and right click to Create DB connection. This will open the New Database dialogue box then enter a Name, Purpose and Description and then select next.
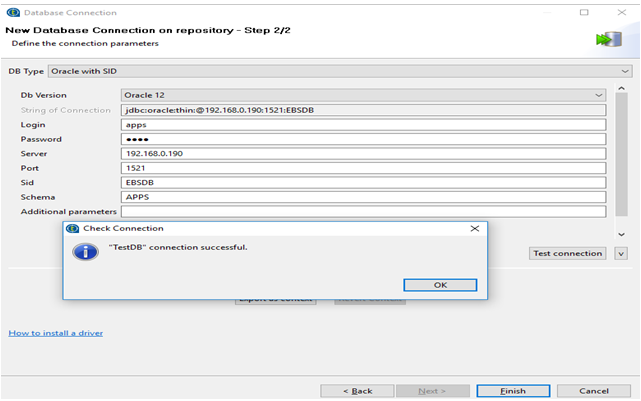
Click on Ok then Click on Finish, and now you’ll see the DB connection details under Metadata in Talend Repository.
Creating New Project/Connection to connect SFDC (Salesforce) from Talend:
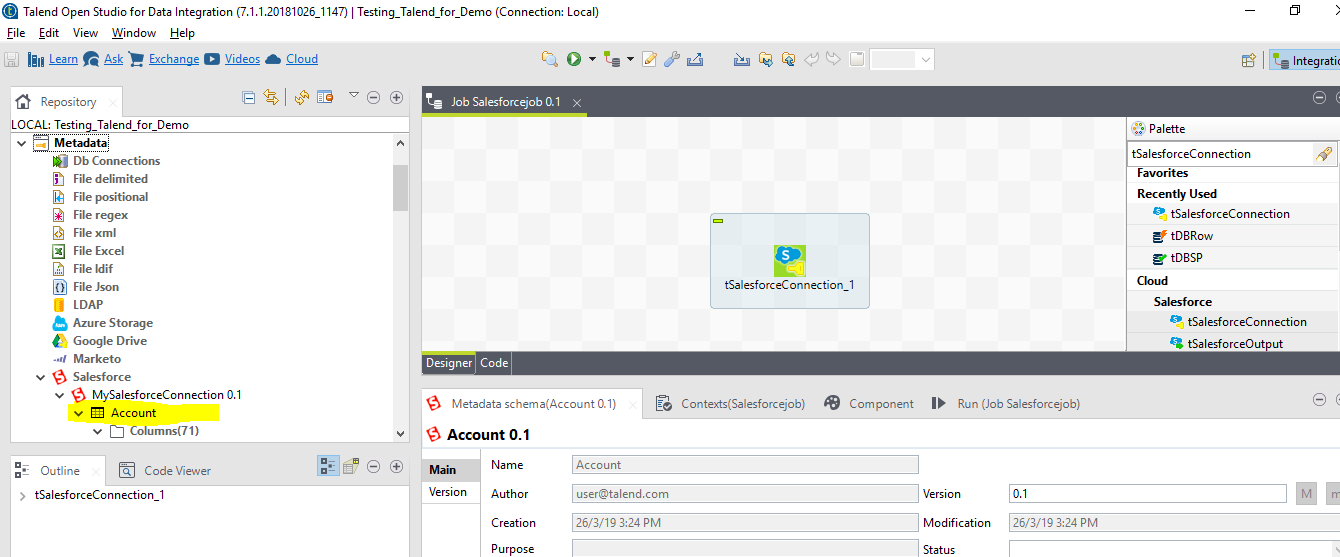
Start the Talend Studio (TOS) and wait for the logon screen to appear. In the Repository tree view, expand the Metadata node, right-click the Salesforce tree node and select Salesforce Connection from the pop-up menu and give the proper details to test the SF connection.
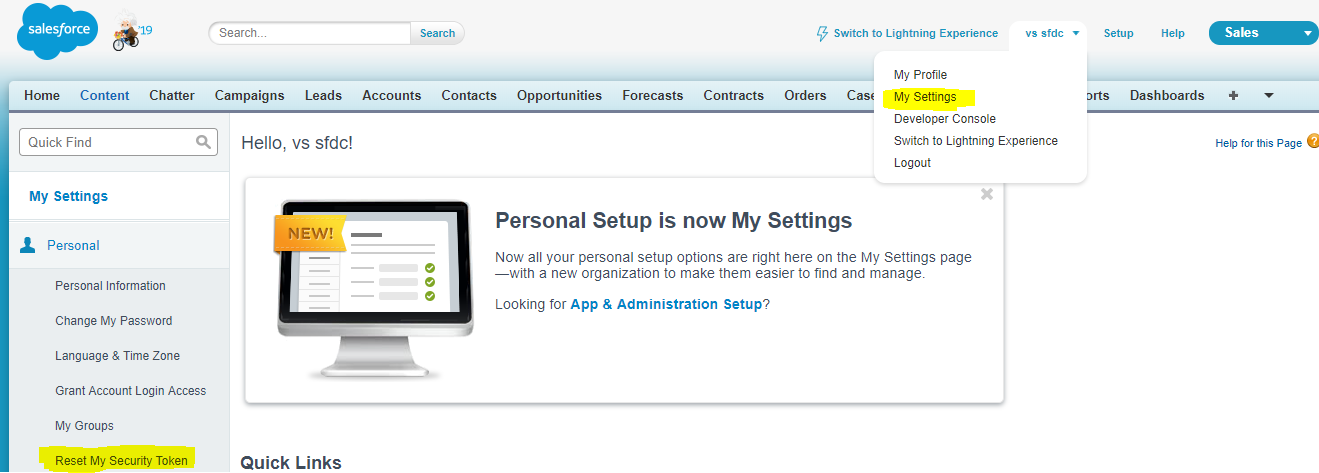
For Security token, go to My Profile under login name in Salesforce login page and click on My Settings\\Personal then click on Reset My Security Token. You will receive the message to mail.
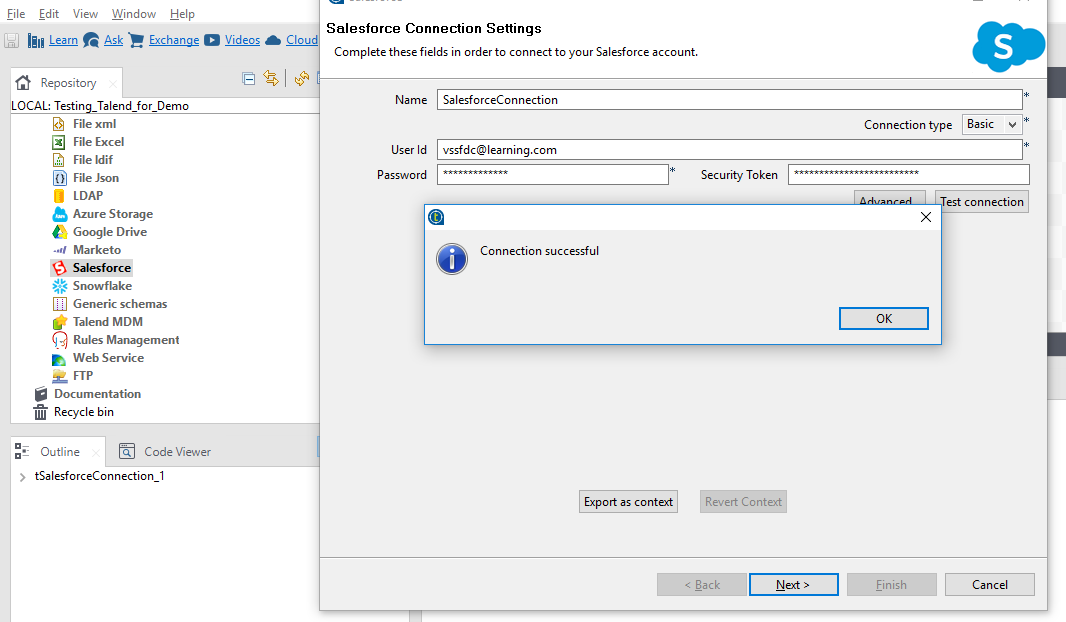
Click on ok after receiving Connection Successful message and click on next to Select Schema to create area from drop down.
Here I have selected Account module from dropdown then click on Finish. After that you will able to see the Account module under salesforce node tree.
